Wednesday, October 31, 2012

Radioactive Slime Leopard Print

HAPPY HALLOWEEN!

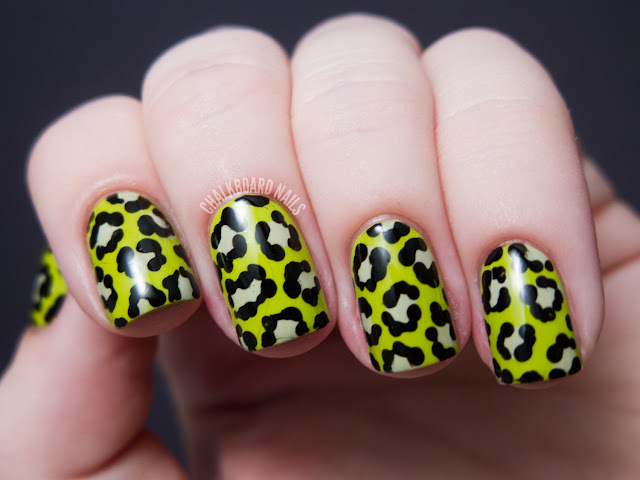
I hope you guys have a fantastic holiday! I don't have any more Halloween specific nails to share with you (whomp whomp), but I do have these oozy-green leopard print nails! They look very "toxic waste," don't you think?


For the base of this manicure I used American Apparel Crescent Heights. It's a really nice green that kind of reminds me of a cleaner version of OPI Who the Shrek Are You?.

Then, I added on spots of Sally Hansen Wet Cement to be the center of the leopard print. Unfortunately, it didn't contrast as much as I expected and you can only barely tell it's there. OH WELL!

The final step was adding the black markings. I used American Apparel Hassid.


If you've never tried a leopard print, be sure to check out my video tutorial!


Have a fun night, and everyone be safe! I will be burying myself in a pile of candy, personally...
Share:

Tuesday, October 30, 2012

Pink Fishtail Ombre

Hey guys! Today's post is a manicure that I did that I wasn't crazy about, but I can't exactly place why. I think maybe I'm reacting to the black tips? I figured I'd share it anyway, though, as I know my tastes don't always completely match up with yours!


So let's start with the obvious here: it's a fishtail chevron manicure! I've made a video tutorial for this technique before, so make sure to check it out if you want to give this look a try. But don't be fooled -- not only is it just a fishtail, but it's also an ombre... and it has a naked nail base. Phew!


I believe the colors I used in the ombre were China Glaze Purr-fect Plum, Sally Hansen Twisted Pink, OPI If You Moust, You Moust, OPI Sparrow Me the Drama, and OPI Steady As She Rose.

The black is OPI Black Onyx.


What do you guys think of this look? Are you a fan, or, like me, are you unconvinced?
Share:

Monday, October 29, 2012

Bustin' a Mauve with Some Taped Stiletto Moons

Good morning! Today's post uses one of the Nicole by OPI Target Exclusives for Fall 2012 - Just Busta Mauve.


Nicole by OPI Just Busta Mauve is very interesting! It's a copper and blue fleck-type polish. There are other colors in it as well, like rosy pink and gold, and it seems to change color a bit when you move it around. I was curious how it would look over black, so I used it in this tape manicure over a plain black creme base.

I used two thin coats of it in the tape manicure here, so if you were to wear it alone, I think you would probably need three for opacity.


The particles in the polish are small, but it's still easy to see that they are irregularly shaped. They lay flat and are completely smooth with one coat of topcoat. It also applies easily and evenly.

I love the way this looks -- so fall/winter appropriate. Overall, I think it's a great and unique offering from Nicole by OPI!


What do you guys think of this shade? While the color of this polish normally wouldn't appeal to me, I really do enjoy the way this particular polish pulls it off. I don't have anything like it in my collection.

Just Busta Mauve is available now at Target and on Target.com for $7.04. Nicole by OPI polishes are 3-free.

Some of the products in this post were sent to me for review.
Share:

Saturday, October 27, 2012

Saran Wrap Spiderwebs

Another Halloween manicure? Oh yeah, you know it!


This manicure was actually my first ever Saran wrap marble attempt, even though I am posting it after the purpley one from earlier this week. I began with a base of Sally Hansen Wet Cement, and then once that was dry I painted on a layer of LCN Tokyo Expression. Then I swiftly took a wadded up piece of plastic wrap and dabbed it on to create the pattern.


The final step in this manicure was the webbing. I actually used a Migi nail art pen this time, instead of my usual nail art brush. It was an interesting experience, and I while I do think I need a bit more practice to refine my lines, I was pleased with the outcome.

The Migi pens are different from, say, the Sally Hansen ones. The SH ones are more like actual pens, where you just hold it and draw on. My experiences with those pens have not been very good at all... I don't think they draw well, they are watery, and the lines I draw don't always hold their shape. These Migi pens are the type where you squeeze the body of the bottle and it comes out a metal nib.


The pen I used also drew on kind of thick, but I'm sure that was more my inexperience with it than anything. The topcoat mostly took care of that but I could still feel a few bumps here and there.


For those of you that have Halloween parties tonight (like me!) be safe and have fun! :D
Share:

Friday, October 26, 2012

Ectoplasmic Watercolor Manicure

It's Friday, and I've got another Halloween manicure for you! This manicure is meant to look spooky and eerily ethereal, like spirits floating around on Halloween night.

These absolutely make me think of Slimer from Ghostbusters, who is apparently made entirely of ectoplasm. I didn't originally know what he was made of, but it works out great because I had already been referring to it as an ectoplasm manicure in my head.


This manicure was done using only two colors and the watercolor technique. For the base, I used American Apparel Hassid. The green is LCN Fanappleistic. You can find a tutorial for the watercolor method on Beauty Geeks.


If you're not into the "Slimer look," try thinking of these as jellyfish in the deep ocean!


Tomorrow's post is another Halloween design. Till then, have a nice Friday!
Share:

Thursday, October 25, 2012

Purple Saran Wrap with Black Rhinestones

Hey folks! I'm back today with a technique that I just tried for the first time recently... the Saran wrap marble! There are two types of marbles that use plastic wrap, to my knowledge. The first method is one where you paint a marble onto the plastic, let it dry, and use it like a nail wrap or sticker. The second method, the one I used, is simpler and faster! Let's take a look at the outcome.


PRETTY! I just love the effect that this technique creates!

It's a simple concept, really. Paint on one color, let it dry completely. Paint on a second color, take a wadded up piece of plastic wrap, and dab it over the top while the second layer is still wet. THAT'S. IT. The plastic wrap removes some of the polish in this interesting, almost tie-dyed pattern. You can find a tutorial for this method on Nailed It.


For my manicure, I started with a base of American Apparel L'Esprit. The second color in my marble is Essie Play Date. Then, to complete the look, I added some black accent rhinestones at the base of every nail.


Doesn't the effect kind of look like acid wash...except trendy and modern?


I do have some more Halloween designs lined up to share with you guys but I was just feelin' these this morning. :) Stay tuned for those tomorrow and this weekend!
Share:

Tuesday, October 23, 2012

Laser Tape Gradient

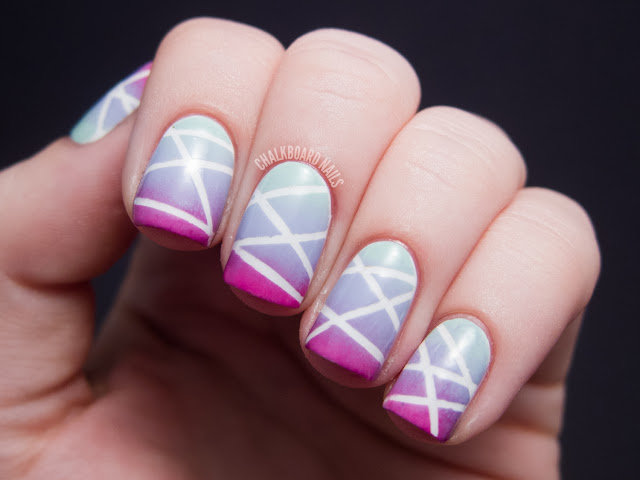
Good afternoon! Today I'm sharing a quick little post of a laser tape gradient manicure that I did this weekend. This look is inspired by a manicure that The Nail Polish Challenge did for the Cool vs. Warm nail art contest. Hers is lovely in shades of blue, be sure to stop by The Nail Polish Challenge and check it out!


I started with a white base -- OPI Alpine Snow, to be exact! Then, I added a coat of Seche Vite to speed up the dry time.

I took pieces of striping tape and placed them over my nails in random patterns. Then, I made a gradient of American Apparel Office, American Apparel L'Esprit, and Zoya Audrina and sponged it on top of the tape. When I removed the tape, this was left! Pretty simple, really!


I wasn't sure about putting such a highly pigmented shade of pink with the two pastel colors, but I actually really loved the way it turned out.


I made an American Apparel polish purchase a week or two ago, and have been really impressed with the quality of their polish. I only owned one before and hadn't used it much in nail art. The formulas are thick but not clumpy... think "rich" instead! I've used L'Esprit the most so far (the purple in the middle) and can tell you that it's a lovely one coater with great control.


Special thanks goes to @hillarykozuch on Instagram for Zoya Audrina, which I won as part of a prize package in one of her contests. :)


Hope you guys are having a nice Tuesday! Thanks for reading! <3
Share:

Monday, October 22, 2012

Different Dimension Pretty Little Liars Collection

Good morning! Let's start off the week with some indie swatches, what do you think? The collection we're going to be looking at today is the Pretty Little Liars Collection by Different Dimension. I don't watch the show myself, but I sure do like these polishes!


Aria is a gorgeous heavy purple shimmer topcoat. It looks whitish in the bottle and is best layered over another color. I've shown it here over American Apparel 7th and Alameda. It will lighten the color you put it over a bit, but is definitely worth it for the amount of shimmer you get. It's really ethereal and absolutely noticeable.


Emily is a microglitter polish that can be worn alone. It is a blue base with blue, sea green, and white microglitters, and I've shown three coats here. I like the color combination in this one a lot. Lovely and speckled!


Hanna is my favorite in the bunch! Similar in finish to Emily, Hanna is a microglitter in a tinted base. This time, it's a purpley base with white, blue, and magenta microglitters. Vaguely patriotic, almost! I love the contrast that you get between the base and its glitter colors. This is two coats.


Spencer is a glitter with an edge. It's a red jelly base with red and black microglitters, as well as holographic silver glitters. It's intensely sparkly and rich looking! Definitely a good polish for an indie polish lover's date night. I've shown three coats here.


As far as formula, all of these were great. The glitters spread evenly on their own, and the bases weren't too thick. They were juuuust right (said in my best Goldilocks voice)!

Different Dimension is sold on Etsy, and you can also like the brand on Facebook for news and updates! This particular collection is sold as individual bottles and as a discounted set.

The products in this post were provided to me for review.
Share:

Sunday, October 21, 2012

Gold Pinstripe Nails - Zoya Ornate Nail Art

Hey guys! Today I have a manicure for you that I created using the Zoya Ornate collection, Zoya's new collection for Winter/Holiday 2012.


The gorgeously deep and sparkly red nails are Zoya Blaze. It's a rich red (very holiday appropriate) with these amazing sparkly fleck pieces. The flecks are really interesting. They aren't a shimmer and they aren't a glitter, but they sparkle like it, and they lay completely flat! I only needed two coats for opacity.

The accent pointer is Zoya Storm. It has fleck pieces which are very similar to the ones in Blaze. It kind of reminds me of newly poured asphalt, but in a fashion-y, glamorous kind of way. Again, I used two coats here.


I originally posted this on my Instagram without the gold stripe down the middle, but I couldn't resist fussing with it just a little bit more!

I placed two pieces of striping tape down the middle of my nail, leaving a very thin space between them. I painted Zoya Ziv down the middle, and then removed the tape. It left this lovely, superthin gold pinstripe that I think complemented the manicure well.

Ziv is definitely a great gold, and I hope to show you more of it soon. Suffice to say, if you are a gold lover, you should get it!


Aren't the finishes on Blaze and Storm so cool? I just love the depth that they have... so interesting without being obnoxious. They definitely have the subtle bling thing down.


Expect more Zoya Ornate looks from me soon! This collection is beautiful!


The Zoya Ornate Collection is available for purchase now and can be found on Zoya.com for $8 each*.

The products in this post were provided to me for review.
Share:

Friday, October 19, 2012

Costume Nails: Dorothy from The Wizard of Oz

This Halloween season, why let your body have all the fun dressing up in costume? I say costume your nails, too!


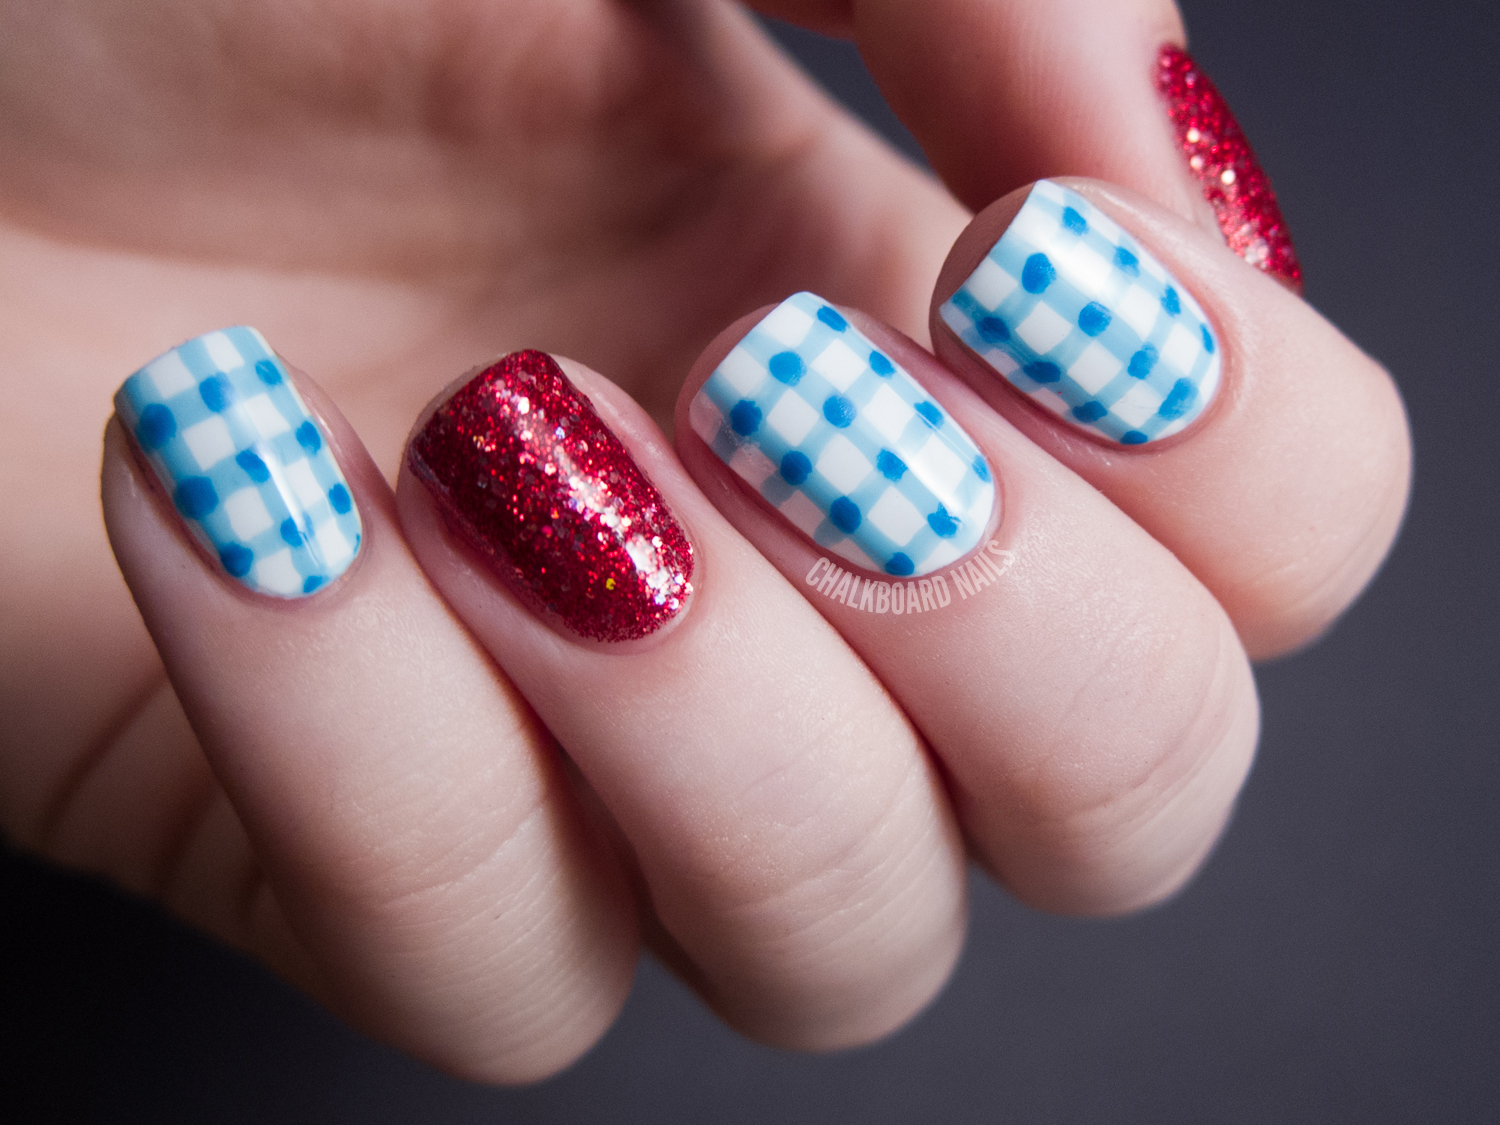
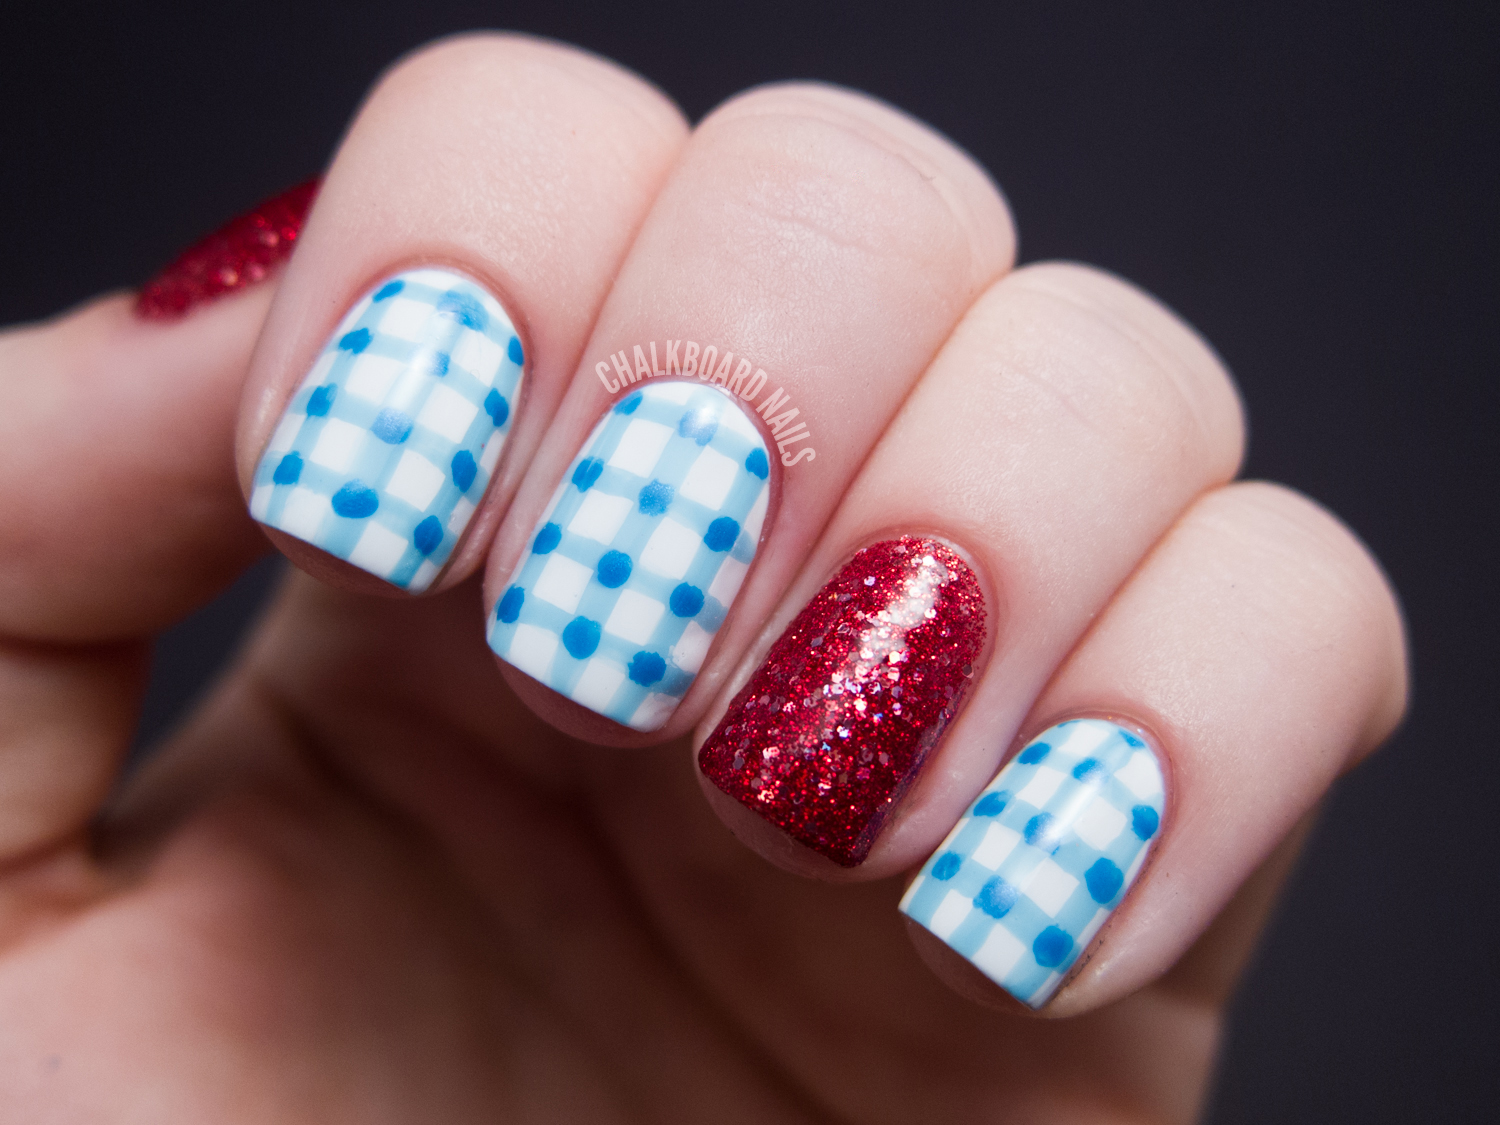
These nails were inspired by Dorothy from The Wizard of Oz. I'm sure you're all familiar, but I'm gonna go ahead and explain it anyway... the blue gingham was inspired by her dress, and the red glitter nails were inspired by the all-important ruby slippers.


I used Wet N Wild Color Icon Rockin' Rubies for the red glitter. I believe that I used three coats? But I know what you're thinking. You're thinking that I should have used China Glaze Ruby Pumps. This is the prime opportunity, yeah? Well unfortunately I don't own it. Cue sad trombone.

The gingham was painted on freehand using OPI What's With the Cattitude for the lighter color and China Glaze Sky High-top for the darker intersection areas. My white of choice for the base was OPI Alpine Snow.


For some reason, I always have trouble doing horizontal stripes on my nails. Something about the curve of my nail or the stiffness of my brush makes it really difficult for me. They never seem to go on straight and usually get thicker at one end than at the other.

HOWEVER, this time I tried to take it really slow and they turned out pretty good from the get go. I only had to do a little bit of correcting!


I think this manicure would be a great way for a beginner to practice their striping skills. The end effect is simple and cute, and most lacquer addicts could probably replace these colors with items they already had in their stash.


There's no place like home!
Share:

Wednesday, October 17, 2012

Purple Curved Lattice with Glitter

Morning! Before we get into today's post, I just wanted to remind you all that you can vote once a day in the Tadashi Shoji Nail Art Challenge! My entry is in the middle -- you can read more about it here.

On to the nail art! Today I have a quick and easy look to share with you. This design was actually a "reject" for the delicate print day of the 31 Day Challenge. I did like the way this turned out but it didn't seem quite right for the challenge, so I did my dragonfly print instead and saved this manicure for later.


The base color is Cult Nails Charming. Charming is a limited edition shade but is still for sale in the Cult shop! I love the glowy shimmer in this polish; it makes it look so soft and ethereal.

The curved lattices at my cuticles were painted on freehand in Lime Crime Lavendairy. I used my favorite medium length striper brush to paint them... what else?

The loose glitter was purchased on eBay a year or so ago. I painted a stripe of topcoat down the middle of my nail to stick the glitter to, and then picked up and placed the pieces with a dotting tool dipped in water.


The loose glitter in this manicure made it pretty hard to photograph. They didn't look so dark in person... instead, they seemed to always catch the light like in this photo below.


I really love the lattice-half-moon design and definitely intend to try it again in the future with different colors.


Thanks for reading! :)
Share:

Tuesday, October 16, 2012

The Tadashi Shoji Nail Art Challenge

I'm excited to announce that The Tadashi Shoji Nail Art Challenge has just gone live! Click the link below to be taken to the voting page and follow the instructions there. My entry can be found in the middle of the grid, and you can vote daily! Fun fun fun!

Click here to get right to the voting -- if you like my design I'd love your vote!

A little background on the challenge... a bit ago I was contacted by someone from Tadashi Shoji, the clothing designer, asking me if I wanted to participate in a nail art challenge. The challenge was to create a nail design inspired by their Spring/Summer 2013 line that had just debuted at New York Fashion Week. I immediately and enthusiastically said yes!

After taking a look at what was presented in the runway show, I began brainstorming ideas. Two dresses in particular stood out to me -- a purple, yellow-green, and white dress, and a nude dress with a very bold lace pattern. I thought, why not combine them? So I did, and that's how my design was born.


Here are the images individually if you'd prefer to view them that way! :) For my gradient, I used OPI Alpine Snow, OPI Don't Talk Bach to Me, and OPI Dutch Ya Just Love OPI. The nude lace was freehanded on in OPI Don't Pretzel My Buttons.


So there's my entry! I am so excited and nervous to be competing in this competition with so many talented ladies! I hope that all of you will take the time to check out the competition and vote on your favorite entries.

Vote here -- if you like my design I'd love your vote!

Runway images from Vogue.
Share:
© Chalkboard Nails | Phoenix, Arizona Nail Artist | All rights reserved.
Blog Design Handcrafted by pipdig